Hasford yes it’s my first one, and I’ve learnt from building this one (along with the Pedal which was my first prop, there is a thread here…Trap Pedal Finished - Ghost Traps - GBFans.com).
I will make another Trap & Pedal next year now I know what I’m doing…lol…Thanks for your feedback, much appreciated.
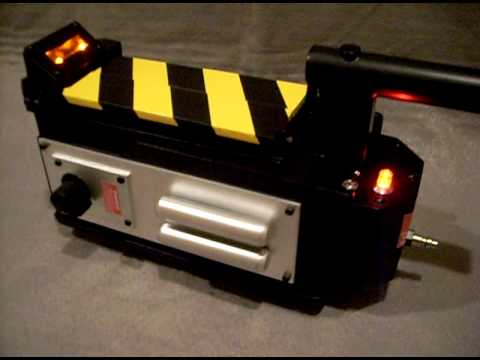
Gareee, the silver on the Battery box is just for weathering later, like the Trap body, it will be sprayed black. If I decide to weather I will rub down the top 3 black coats with very fine wet & dry paper, I think weathering looks better done this way.
Oh…and here is my son with a huge smile and his Christmas presents…Merry Christmas everyone:
Notice the 2 different wristbands and his ID lanyard… (thanks AJ):
I just want to add a huge thank you to everyone on this site, it is with your help that I was given the enthusiasm, understanding, knowledge and insight needed to complete this project, the outcome as you see from the above pics, can not be bought. To make something for someone that is a huge GB fan who could never have dreamed of owning his own Trap & Pedal, and knowing it will be treasured for years to come, was an awesome expieriance for me…So again many thanks to all you guys.
Thanks for your feedback Bob & Irri…those are some of your parts that I used on the Trap & Pedal Irri as you may remember, many thanks for supplying them to the UK.
Bob, well as you see from earlier posts, both Trap & Pedal have been base coated with a few layers of silver before the Satin Black was sprayed on just in case my son wanted me to weather them. However, he’s happy to have them on his shelf with the “new” look paint job.
Was in Wilko’s earlier looking for some bolts and wingnuts (so I can attach the inner cartridge semi permanently, will give more info on my post when I get round to it) and picked up some carriage bolts with the rounded end and low and behold they fit my wheel/bearings like a glove. So I figured I would maybe try and go for that ‘Moon Disc’ style you did, however just at a look at your pics and noticed your bolts were (or looked that way) far too long to fit to into the axle. What I want to know is did you cut the bolt down so you could fit two into one axle, if so how did you then attach them to the axle? I was considering drilling a hole out and just using some epoxy glue/filler to get them in. Would you think that would do the trick?
Sean, the carriage bolts I used (B&Q) had a flat shoulders up near the top that I had to Dremmell off and make them round, I then used an ali rod and cut of a small piece for each wheel for a better fit. Yes they were way too long and so I cut them down to about 25mm. I then drilled the wooden axles slightly bigger than the bolts and packed them with the Aves and pushed the bolts into them. The Aves sets rock hard, and because the holes were slightly larger the Aves squeezes between the thread of the bolt.
If you look carefully you’ll notice up by the bolt head where I Dremmelled it round,and the Ali part.
Awesome! Luckily the square part on the bolts I picked up fitted perfectly without any real wiggle room and they seem to spin lovely too.
I shall get them chopped down and fitted soon hopefully! With any luck I should start making some real progression on the outer part of my trap now! Can’t wait to put the side plates on either!

 :crunch: