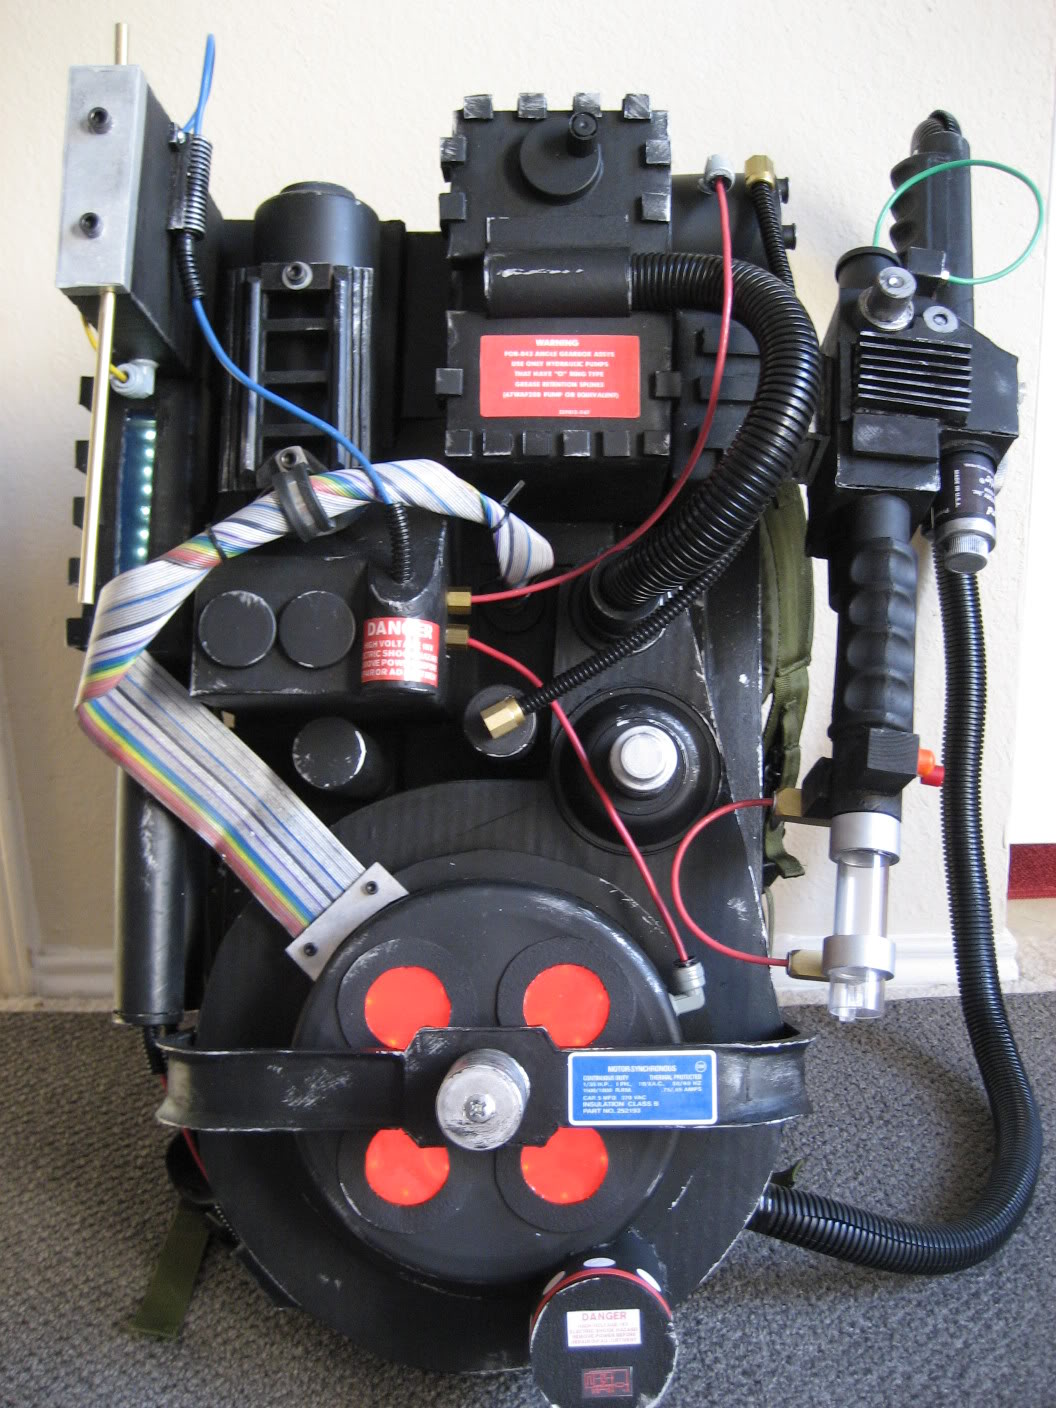
I just got done painting the black base on my pack, and am starting to put on all the resistors/wires/doodads. After the pack is all put together, I was wondering how to achieve that “battle damage” look with the metal showing on the corners.
I did not prime the pack with a gray color, only black, so I can’t really scratch off the black paint. I was wondering if there was another method to apply that beat up/dusty look on the pack, shown here: http://www.gbfans.com/equipment/reference/1/20/
One trick someone mentioned is get some aluminum craft paint (not silver, not chrome) and dab it on here and there randomly on exposed corners and the like with a sponge brush.
Also, I’d try getting a little paint on a paper towel and dab the paper towel with another one to suck up any excess paint and then rub it across exposed edges, like the ridges of your heat sink. The idea is to get streaks of aluminum that don’t really cover up the black very well.
Another thing you could do is water some paint down a lot, so it’s like gray water and then dip your sponge brush in that and paint over your black surface which should give it an aged appearance. I saw someone had a gun whose metal and stickers they’d seemed to have gone over using a method like this and it looked great.
Of course you may want to try any techniques on a test piece first. But you can always rub the paint off while it’s still wet.
My plan was to spray mine with a layer or two of aluminum paint and then cover it in black and sand a little around the edges. Has anyone tried this, or is it a bad idea?
Thanks for that! Been looking for a good source of Fuller’s Earth. It comes in different colors though and it’s often hard to know exaclty what you’re gonna get or if the store is reliable. Just bought a jar!
using silver acrylic paint, use a 1’2 inch wide stiff bristle brush. put a MINIMAL amount of paint on the brush and lightly go over the edges and corners. Don’t over do it, less is more. You usually put more at locations there would be more wear and tear.Skip areas and make it look random
One favorite technique of mine is taking rust colored pastels and rubbing them on sandpaper. the resulting powder is perfect to dry brush on or combine with water and do a light ‘wash’ on.
All the hex bolts need a healthy dose of this rust dust imho.
A black wash (using black pastels or very thinned out black paint) is great too - especially to sink into the nooks and crannies of your silver-painted plastic parts so that they look metal and not so silver-painted-plastic-y.
The cyclotron on the real prop has that textured surface to it. At your home depot pick up ‘hammered surface’ paint. It freaking rawks and is perfect for that subtle extra realism.
As mentioned - for paint chips nothing beats a silver undercoat, using masking fluid (or mustard!), painting and then taking the masking fluid off. Those sharp flaky edges are really hard to paint with a paintbrush.
For severely weathered props - sometimes I’d just straight up throw dirt on them - then use a hair dryer to take it back off. The real ‘dirt’ of things is sometimes the best.
Super fine sandpaper on the labels can make them look not so new. As well as tea-staining them. (literally soaking them in tea or coffee for a bit to make them off white - depends on what kind of labels you’re getting - paper - vinyl etc.)
 One method.