48R is too tight  Perfect length though!
That rear handle needs to move back a smidge. It needs to line up with the rear cylinder like this:
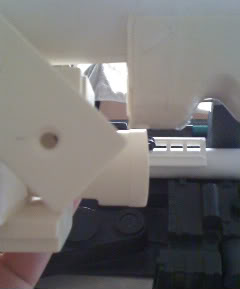
Not much can be done about that at this point.
Not necessarily, how did you attach that grip? Is it glued down pretty good?
epoxy and screws. Also the end of the grip is pretty much the end of the handle so id have to put a whole new rear handle in if i wanted to move it now. It doesn’t matter enough for me to bother. Live and learn. This is my first build so there will be a lot of mistakes made. The next one will be much better 
Man you guys weren’t kidding about how easy it is to work with styrene! I finally got mine in today, and wow. Repairs should be pretty simple, and I’m really considering doing my ion arm from scratch instead of buying a resin one. worth a try, right? Hopefully will have pics soon 
Tried scratchbuilding an ion arm. Not very happy with the results. The bigass fake welds, mostly.
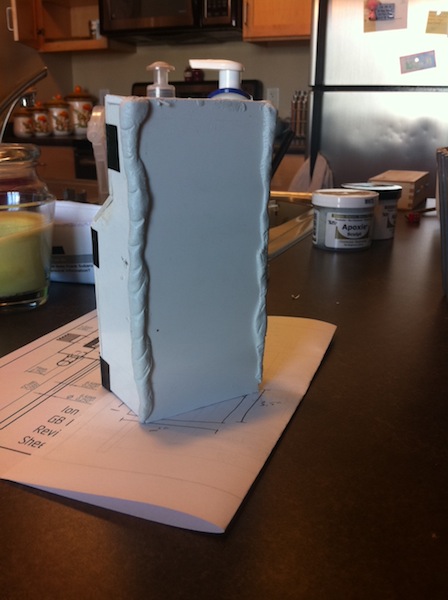
Not sure if I should bother trying again, or just buy a resin one..
Just got my clippards and tubing, thanks Phish4dinner!!
Pictured on my new nomex flight suit with GB2 style namepatch:
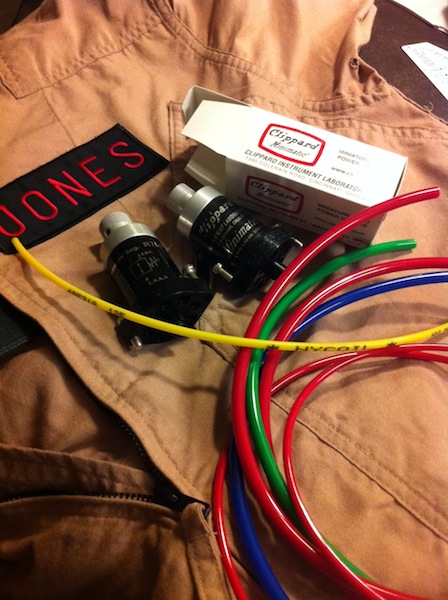
I want my patches stitched on, but since I suck at sewing, I figured I’d use some fabric glue to get them where I want them, and I’ll sew them on once the glue dries. Just kinda keeps them from moving around and becoming crooked
YESSS Just ordered my bumper and booster frame from nick-a-tron. I’m so excited!!!
I did a bunch of cleanup work this weekend, like sanding the edges of my motherboard so I dont cut myself every time I pick up my pack, drilling my holes in my alice frame, drilling the middle hole for my clippard on my thrower, etc.
So I found a copper fitting that actually fits really well as a tip converter. I know copper is not screen accurate, but I was planning on painting the tip converter black anyway (I don’t plan on weathering my pack, I’m going for the “straight off Egon’s workbench” look).
What do you guys think?
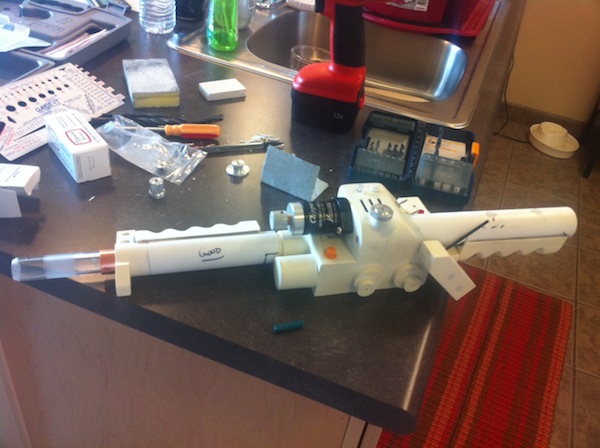
Shell mounted!

Got my R2DEVO light kit! This is amazing- HIGHLY recommended!!
Here it is in action:
lookie lookie what just showed up 

Dollarama $1 each 
Nice! Those are the same dollar store flashlights I used.
I actually ordered them from dollarama.com because the only dollar stores i know of are in REALLY ghetto parts of town.
I’m actually planning on painting them black inside. I want them for sealing out light and holding the LEDs, but I don’t like having them actually reflecting.
I think now that I have most of the parts I need, the biggest snag I’m hitting is how to actually attach everything. Most of the build threads I read show progress with adding parts, with lots of photos, but very few build threads on methods of actually attaching various parts. Especially with how much of it is resin, knowing that bolts into resin don’t work very well…
for a lot of the parts (like PPD, injectors, ion arm, etc) I was thinking id drill a hole, put in a bolt, and fill the hole with either epoxy or apoxy sculpt, and then screwing a nut onto the bolt from the inside of the shell. What do you guys think?