Michael Scott's Pack Build - Venky Shell - 2013/2014 (some photos recovered 2019)

(Edit: Image Shack stopped hosting my pictures, so I lost a lot of pre-build content. However I recovered some build pictures later in the thread and those have been revived.)

I’m in the process of compiling parts for my latest and greatest proton pack build. I plan to use aluminum parts where available, except for the N-filter, which is molded in to the shell I’ve ordered from Venky. The plan now is to have this be mostly a GB2 pack, but there might be a detail or two that hold to the traditional GB1 packs. It’s my custom build, so I’m going to pick and choose what I like best, or in some cases just because I already have certain parts on hand. This build is going to be a slow one, partly because I don’t have my shell yet, and partly because I’m still in the process of gathering the parts I want, and saving up money for said parts.

That being said, I’ve got a couple of boxes in my bedroom next to my old pack that have my new parts in them, and it’s getting hard to resist tinkering with them. So before I start drilling holes and painting, I wanted to post what they looked like when I first got them, some of them with parts already fitted. So here goes!

Here are the boxes of parts. I won’t waste time posting pictures of tubing and some of the smaller stuff until they are fitted on the parts later.

I bought the GBfans gun track (MIP!) and heatsink during the Black Friday sales last year. That makes good financial sense, good advice. I won’t be working on the thrower for quite a while, so these will stay in the box until then.

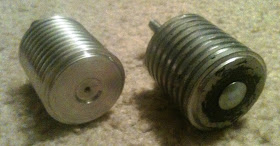
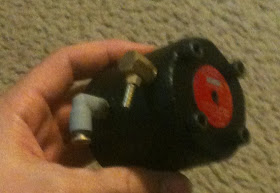
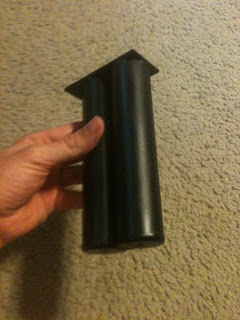
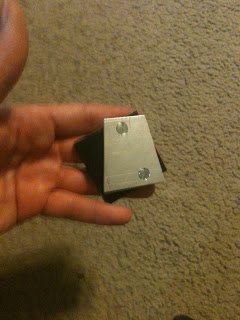
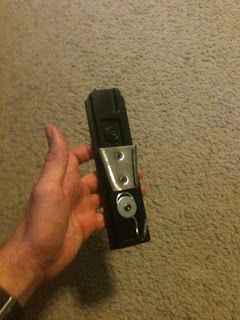
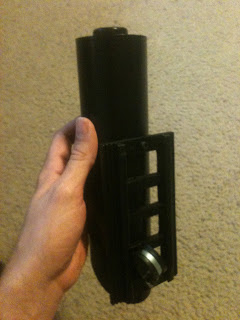
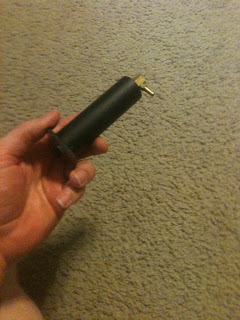
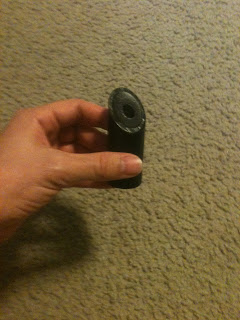
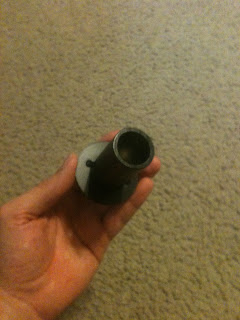
I also bought the injector tubes from the GBfans shop. I plan to use the hose barbs for the tubing. I need to buy a few more, I had to borrow these from my old pack to show them off for the pictures. I provided a few angles to show off the base where it’s mounted to the shell as well as the degree to which it is offset on the plate.

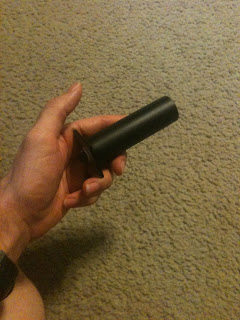
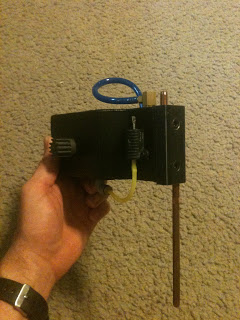
I’ve been buying a lot of the new aluminum parts from Multimedia Mayhem. I’m considering having my checks direct deposited to him. Here’s a group shot of the PPD, GB2 ion arm end cap, and vac tube. I plan to use a hose barb on the PPD as well.

Here’s the MMM beam line and filler tube.

The part I’m most nervous about is my MMM ion arm. It had holes drilled out for the elbow and one resistor, but I’ll have to drill the rest for the end cap, two other resistors, and the GB2 style Clippard fitting. Some of you guys talk about drilling/tapping parts like it’s nothing, but I’m afraid of what damage I might do to them, since before my builds have been with wood and foamboard.

So far my favorite part I’ve bought is the HGA. It’s from MMM, and I asked Colin if he would custom drill the elbow holes for me. I noticed in pictures of the Ramis Profiles in History auction pack that the two elbows were not exactly lined up, actually noticably offset. I’d never seen that before, or seen another build with that detail, so I had mine made that way to give it a little character. It’ll be a nice detail that will help identify it if it ever gets lost in a pile of other proton packs. Hey, it could happen!

Here’s the photos I found here on the site and sent to Colin.

I’ll take more pictures of other inventory when it arrives or when I take some parts off of my old pack, like the Clippard valve for example, and if I do decide to start drilling I’ll post the results of that as well. I don’t have a lot of time for all of this, being married with a 5 year old playing T-Ball and a 10 month old deciding he doesn’t like the idea of sleeping at night makes hobby time hard to come by, but I’m itching to get started whenever I can.

Thanks for looking!

cant wait to see more of your build! its gonna be sweet!

Thanks! I can’t wait to build it!

By the way, just a tip, if anyone is building with aluminum for the first time like me, be sure to test fit your pieces together before mounting them on the shell. For instance, I could hand turn the Clippard elbow on my HGA a few turns, but after that it locked up pretty bad. I ended up holding it down with all of my strength and ratcheting the elbow into place. Just because the threading looks clear doesn’t mean that it is. If one was to mount the HGA on a shell, and then have to apply so much force to add the elbow, there’s a good chance a lot of damage could be done to the shell in the process. Also, have some WD-40 on hand.

Many of the brass Clippard fittings are an NPT thread, so it tapers. These fittings in the real world are designed to NOT seat fully in their mating threaded hole. If you aren’t careful and over-tighten one of these fittings, you can actually crack the threaded aluminum. I typically tap these holes as large as possible or drill them out and use epoxy putty to hold the fittings in.

1 Like

It is also best to cut a tap down, or drill a larger tap hole so the tap itself is further in on the threads. This will ensure the fitting sits flush.

Just an FYI and I hate to be the bearer of bad news but… Your MMM beam line and filler tube are to large for the Venky shell. The one that gets the clippard elbow and sits in the valley will not fit at all. The tubes in the Ramis pack were 1 1/8" instead if the common 1 3/8" size.

I have a shell from Venky and will be making custom tubes for my pack. Tubing is bought and plates and caps have been water jet :wink:

2 Likes

Well that stinks. There’s no way to make it fit? Hard to believe a quarter of an inch makes that big of a difference.

Maybe I’ll trade my tubes for a v-hook or shock mount or something.

I just read MMMs sale thread. They are indeed the correct 1 1/8” OD. So you’re ready to go good sir. :slight_smile:

Taken from his sale thread..

Thanks :cool:

Haha, awesome. I guess I could measure them myself before proposing hypothetical trades for other parts. Relieved.

I stand corrected. I didn’t check, but figured they were made to the same commonly used specs.

I spoke in my first post about this being a bit of a hybrid GB1/GB2 pack, but leaning more towards GB2. The main reason is because a lot of the parts I have on my current wooden pack are GB2 parts.

In the GB2 category, I’ve already got a ‘spectra strip’ ribbon cable, LC-2 ALICE frame (without the giant padding), and I’ll be putting the Clippard hex elbow on the top of the ion arm. In the GB1 category, I’ve got a gray crank knob, though I could easily paint it black, which I may end up doing, and I plan on using socket head cap screws in appropriate places rather than the slots.

I haven’t yet decided how much weathering I’ll do, but at the moment I’m leaning toward a clean look with little weathering. I still need to buy a more accurate v-hook, so the angle the thrower sits hasn’t been decided yet. I’ll also need to decide how I want to fill my N-Filter and how I want to attach my shock mount, which is still in the ‘wanted’ category.

One question I do have is about the injector tubes. I saw on the description for them in the shop that they can be flipped around to correspond to each of the movies, but it never says which way goes with either movie. If I stay more along the lines of a GB2 pack, which way should I mount it?

I realize that I may have overlooked some things that separate GB1 and GB2 packs, so feel free to chime in and add them to my list. Also let me know if I’ve gotten anything listed above backwards, which is entirely possible.

Finally, thanks for the info about the Clippard fittings being tapered and that being the reason I was having so much trouble getting them tightened. I’ve been studying pack build threads quite often recently and I haven’t seen that come up.

In the rare spare time I’ve had lately, I’ve tackled some of the drilling on my ion arm. I think it turned out pretty good, take a look:

Sorry for the cell phone pics. That’s the only option I have at the moment.

I had to drill for the two smaller resistors, the end cap, and the Clippard elbow. Like I said, my spare time is infrequent, so I actually sat down 4 different times to drill for the separate parts. The Clippard was last this morning. I added a little tubing just to spruce up the pictures with some color.

Yes I know that I still need to work on my smc elbow, that’s down the line. I’m also still contemplating which resistor combination I want to use. I’ve got the full set of Dale resistors, as well as the longer Sage resistor as seen in the picture. I think the next time I buy something from the GBFans shop I’ll include the Pacific resistor, since that’s the one I’ve seen on the retrofitted GB2 packs. I noticed the longer Sage resistor is on the PIH Ramis pack and the longer Dale resistor is still on the Sony Lobby pack. (I realize this is common knowledge for most people, I’m just now noticing these details as I look at pictures.) I’ve been kind of basing my pack around some of the finer details of the Ramis pack, without trying to replicate it (i.e. the Ramis pack has the GB1 ion arm end cap still attached, I’m more than committed to the GB2 style now with a huge hole in the top of my ion arm.) Any input on which way I should go with the resistors?

That’s about all I’ve done so far. I’m taking my time as best I can. I don’t want to rush things and ruin a $40 aluminum part! I’m really in no big hurry since I don’t have a shell in hand, but it’ll be nice to have a lot of this stuff ready to install when it does arrive. I’ll also be getting an aluminum booster tube from MMM soon, and MandoMan is hooking me up with a jpa35 shock mount, as soon as my broke butt pays the man.

Thanks for taking a look. As always, comments are welcome, just don’t crush my dreams if I did something wrong!

If you aren’t trying to replicate a specific pack then I would say pick the resistor set up you like best. In the grand scheme of things only you will really pay attention to what ones are there. I stress about this stuff myself on my pack and you just have to keep in mind that its really all for you only.

I’ll be posting some more pictures in the next few days. I’m priming and painting my aluminum parts, and I’ve added some more inventory and checked a few big boxes off my wanted list. Looking forward to showing you guys what I’ve got so far.

I decided to prime and paint most of the aluminum parts I have since it’ll be a little longer until I get my booster tube. I mounted a lot of the pieces to a pizza box so that I could easily rotate them different angles without getting finger prints all over them. Only the PPD and vac tube aren’t attached. I also repainted my old MMM bumper satin black. It had been gloss, or something else that wasn’t right. I know it looks like I dumped a bucket of paint on them, but I swear I didn’t. Rattle can painting in the past has been adequate at best, disappointing at worst for me in the past, so hopefully this won’t be a disaster when the paint dries.

I scored a deal with MandoMan on a nice shock mount, ion knob, bumper nose, whatever you want to call it. It’s a jpa35 part and I’m really happy with it. Thanks MandoMan!

Here it is next to the one I’m replacing it with. An old ebay part that was never satisfactory to me. Upgrade!

image

I also hit up the hardware store and got my carriage bolt set up for the bottom two mounts on my ALICE pack/mobo.

Finally, I’d like to dedicate this post to the memory of the bug that landed on my filler tube while I was painting. I didn’t notice him until I was putting on the second coat, and by that time he was more paint than bug.

Looking great man! Glad you can put the shock mount to good use. And I will have a moment of silence for the poor bug.

I realized today that I should have painted my ion arm end cap with the other parts pictured above. I’ve been reluctant to paint it, just because I like the clean look of the bare aluminum on that part, but I know to be more screen accurate I need to paint/weather it. I might give that a go in the morning, or just wait until the booster tube arrives. I’ll need to paint my ALICE frame at some point too.

Time for an update. I think I’m about done acquiring and priming/painting my aluminum parts, excluding thrower parts. Some still need a bit of detail work done to them, but they’re mostly ready to go when the shell arrives. A few of the following pictures are repeats of work done earlier in the thread, but I threw them all in here for an inventory check list. The part maker is listed with each picture, as well as the third party seller if I didn’t buy them direct. Sorry again for the low quality phone photos. Thanks for looking!

MMM HGA

JoeLuna label

GBFans shop elbows

image

GBFans shop injector tubes

image

MMM resin bumper

jpa35 shock mount (via MandoMan)

JoeLuna label

umoribawar v-hook

GBFans shop gun track

s-hook via ProtonCharger

image

image

Vincenzo booster tube and plug (via MandoMan)

MMM resin booster frame

Not sure where the P-clamp came from, probably either MMM or GBFans shop years ago

image

MMM filler tubes, PPD, and vac tube

image

image

image

image

MMM ion arm, end cap, tubes

GBFans elbows and resistors (though one or two resistors may have come from MMM)

image

Thanks again to these sellers for offering such great products. I’m excited about having a really good looking pack when all is said and done, and that wouldn’t happen without these awesome parts. I recommend all listed above.

My shell is currently making it’s journey from Arizona to Texas (which is not quite as ■■■■■■ as from Milan to Minsk). I’ll soon post some new pictures of my Venky shell. It looks like it’ll arrive on Saturday, but I won’t have an off day from that point until Tuesday, so I’ll just have to stare at it and resist sacrificing sleep to play with my new toy until my work week ends. I hope you guys will continue to follow along and offer advice as the next chapter begins. Glad to be bumping back to page 1 of the Proton Pack section, it’s been too long.