My proton pack build, need help with V hook possion

Well i will start my pack build thread. Not a lot going on at this time but it`s a start. I have a few things on order. And will be making a GB 1 style pack.

I will post photos of the item once i have it in hand and as i go along, And asking for info on what parts i need to buy next..

Items i have so far.

1: Alice frame.

2: A car speaker on a mdf spacer for sound. 6.5 inch. 4ohm

Items i have on order

1: Sevv`s proton shell

2: Replica props sound chip

3: Jupiter electronocs. Pack light kit

4: Jupiter electronocs. thrower light kit

5: Canakit 7watt amp

WOO!

:whatever:

My 7 watt amp came today. I have been and soldered the wires to the pins, And tested for sound all o,k, now i need my sound chip to hit my door mat.

And placed a ordered for a leg hose and flightsuit.

What parts on sevv`s shell packs need fixing in place with some faulse welding

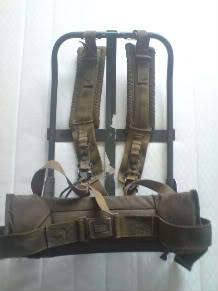
your alice shoulder straps are on incorrectly. the strap that should be on the left is on the right and vice-versa.

well done you passed the test.

Tonight my mate as fitted my replica sound sound chip onto a pcb board for me. As he done this i located some white pistol belts on the net cheap so i ordered 4. and some dye.

Items i have so far.

1: Alice frame. (straps now fitted right)

2: A pair of car speakers on mdf spacers for sound. 6.5 inch. 4ohm

3: Canakit 7 watt amp.

4: Replica props sound chip.

Items i have on order.

1: Sevv`s proton shell.

2: Jupiter electronocs. Pack light kit.

3: Jupiter electronocs. thrower light kit.

4: Nomex flightsuit.

5: Leg house.

6: A few M M M parts.

7: 4 x white pistol belts.

8: rit dye pirl grey

9: shock mount

10: motherboard

Parts to order when ready.

nick-a-tron v3 wand

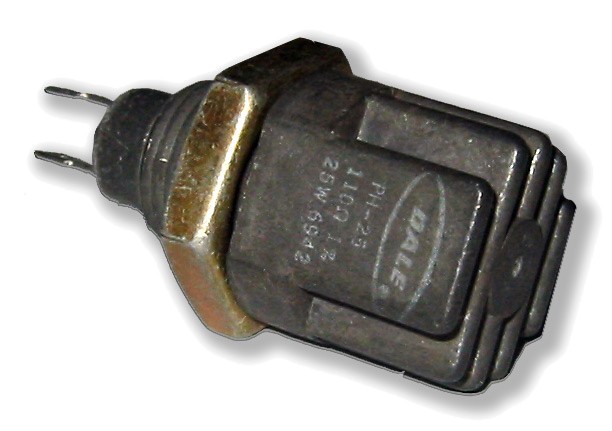
Looking at a few photos of Ion arm extension with the dale valve fitted to it. Some have the hex head then the fins and some have only fins.

What should it be like on my gb1 pack ?

GB1 packs did not use a brass barb on the dale resistor. the blue tubing was simply epoxied onto the metal prong of the resistor.

I’m assuming you’re talking about this dale resistor:

Generally GB1 packs had the hex mounting nut inside the ion arm, GB2 packs had it on the outside.

i have never seen a proton pack with that brass nut on the outside.

I had a play today with my sound chip and amp and speakers. good this thing is loud.

here is the chip board my mate made for me. for my replica props chip insted of the breadboard.

chip easy to remove incase it should need any new sounds adding.

Then i thought i would drill a few holes and use a small green cable ties to secure wires that will be coming from the thrower.

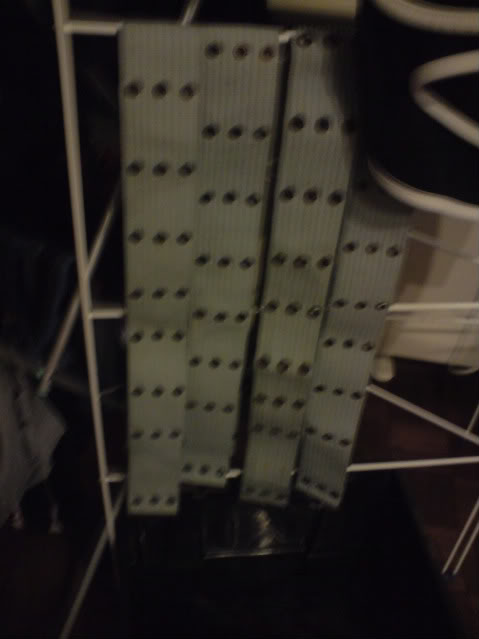
Here are my grey belts.

Items i have so far.

1: Alice frame. (straps now fitted right)

2: A pair of car speakers on mdf spacers for sound. 6.5 inch. 4ohm

3: Canakit 7 watt amp.

4: Replica props sound chip.

5: board for sound chip

6::grey pistol belts

7: nomex flightsuit

8: lenses for pack

9: leg hose

10: a few items from M M M

11: motherboard

Items i have on order.

1: Sevv`s proton shell.

2: Jupiter electronocs. Pack light kit.

3: Jupiter electronocs. thrower light kit.

5: shock mount

Parts to order when ready.

nick-a-tron v3 wand

As i got a few items from M M M i looked at the Best Reference Photos Ever Available!!! and started drilling my resistors. i drilled out the guts of the small resistor so i can insurt the yellow pipe into it.

advise

the item conected to the end of the ion arm with the 2 brass tubes and ally block, how should it be on a gb1 pack..

or can someone post me photos of a gb1 ion arm with all parts fitted to it.

Items i have so far.

1: Alice frame. (straps now fitted right)

2: A pair of JL audio car speakers 4.5 inch. 4ohm

3: Canakit 7 watt amp.

4: Replica props sound chip.

5: board for sound chip

6::grey pistol belts x 4

7: nomex flightsuit

8: lenses for pack

9: leg hose

10: a few items from M M M

11: motherboard

12: shock mount know

Items i have on order.

1: Sevv`s proton shell.

2: Jupiter electronocs. Pack light kit.

3: Jupiter electronocs. thrower light kit.

Parts to order when ready.

nick-a-tron v3 wand

As i got a few items from M M M i looked at the Best Reference Photos Ever Available!!! and started drilling my resistors. i drilled out the guts of the small resistor so i can insurt the yellow pipe into it.

advise

the item conected to the end of the ion arm with the 2 brass tubes and ally block, how should it be on a gb1 pack..

or can someone post me photos of a gb1 ion arm with all parts fitted to it.

Just got my shock mount knob.

and changed my mind on the speakers in the pack due to size of the motherboard. I have now got a pair of jl audio 4.5 inch.

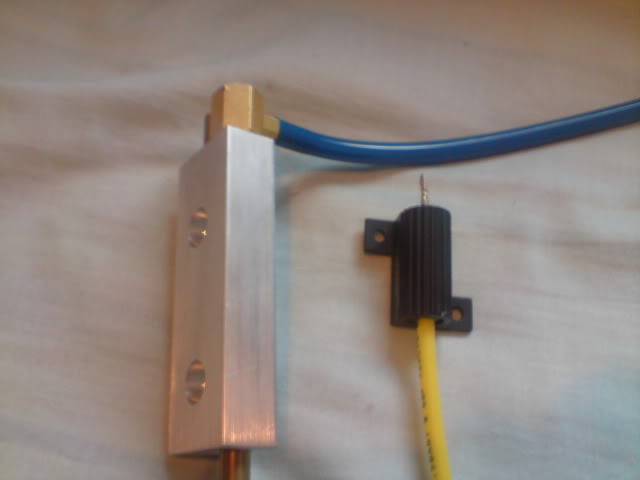
This is how my ion arm assy is

I used the pictures posted by Filandriu’s in his pack build for creating mine. I have seen some with the brass elbows on the aliminium part of the ion arm that has the brass rod attached to it and some have the brass elbow on the main body of the ion arm. Not sure which way is correct. I did mine the way in the pics as it was easier to drill and tap into the resin part rather than the aluminium piece.

I think in GBII the ion arm has a long dale resistor on it which has dale written on it. I ordered i full set of resin parts off Nick-a-tron and i got 2 large resistors he said you can use either one depending if your building a GB1 or GBII pack.

The yellow hose by the way is hard to come by. I got some off Nick-a-tron. He sells a full kit of hose required to build one pack but it does not come with the yellow hose as he doesn’t normally have it. I might of had a spare piece that he had left over from his build. I might have a piece of it left that should be big enough if i have i can send it you if you like.

sbonse’s ion arm is a GB2 style. The GB1 ion arm has a square clippard fitting attached directly to the aluminum block instead of the hex fitting in in the arm.

BoBob,

I answered your PM but added the reply to my thread rather than keeping it as a PM! I figured it was good information for EVERYONE so pointless hiding it away in a private message!

Edit: Also the waist ■■■■■■■■ your ALICE frame is a GB2 style one. GB1 was much thinner and had a different type of buckle!

[quote=“bobob”]
Items i have so far.

1: Alice frame. (straps now fitted right)

2: a second alice frame

3: A pair of JL audio car speakers 4.5 inch. 4ohm

4: Canakit 7 watt amp.

5: Replica props sound chip.

6: board for sound chip

7::grey pistol belts x 4

8: nomex flightsuit

9: lenses for pack

10: leg hose

11: a few items from M M M

12: motherboard

13: shock mount knob

Items i have on order.

1: Sevv`s proton shell. (shipped)

2: Jupiter electronocs. Pack light kit. (shipped)

3: Jupiter electronocs. thrower light kit.(shipped)

4: lc-1 alice frame lower strap.

Parts to order when ready.

nick-a-tron v3 wand

Small resistor with it`s insides drilled out to take the yellow pipe. and blue pipe fitted to the ? part

Can anyone link me to a gb1 style pack ?

As thinking about painting a few items. like my crank knob. but dose it need to be black or black and grey ?

if so what grey paint shall i use ?

Screen grab of a GB1 pack image

And here is the bible for anyone making a GB1 pack..